|
|
|
Creating Hair Textures From Scratch
|
A Tutorial for Beginning to Intermediate Texture Artists by lochnarus |
|
We're going to create a hair texture from scratch with Photoshop using brushes and different filters for the brushes, all in just a few easy steps. For the purposes of this demonstration, I'll be using a hair texture from Loch & Sil's Sexy Female Hair Styles found on Morrowind Summit, if you need to practice with the same texture as I'm using. NOTE: You'll want to have the model in some kind of model viewer to tweak the texture's flow with the polygons as you go. Have it set up with the model using the new texture first, before you start working the hair texture. This way you can see it while you work.
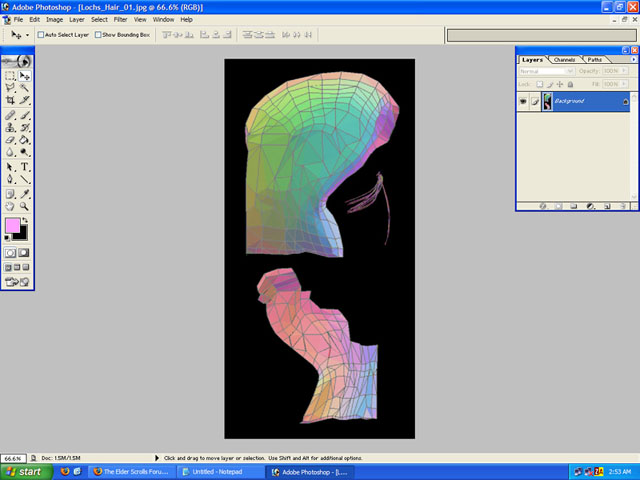
1. Open your UVW
map of your hair model or existing texture you wish to redo
(hopefully you've gotten this far, we'll assume you have or you
wouldn't be reading this) and maximize it to the workspace
on-screen.
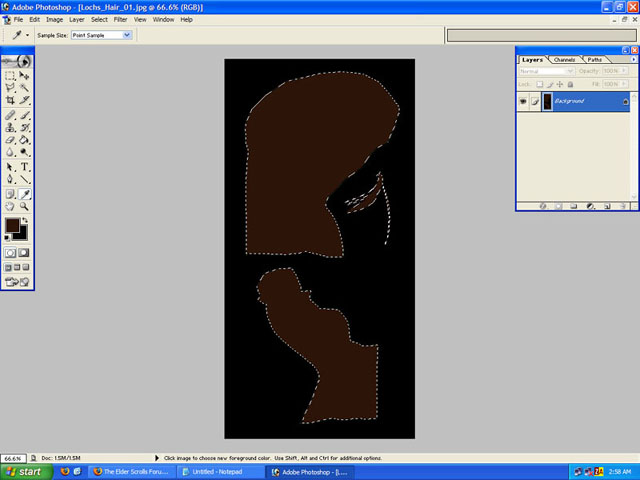
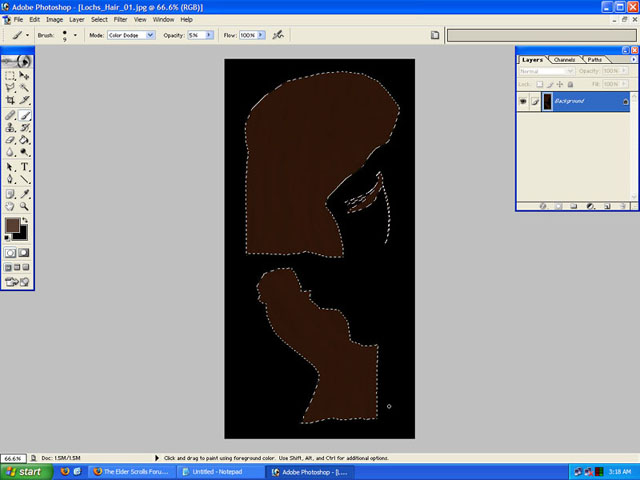
2. Use the magic
wand tool to select all of the black background, then invert the
selection to select the actual textured area. 3. Now pick your
base color. Can be anything you desire, even a color not
normally for hair...this is your call (I chose brown for this
tutorial). Hit Alt+Backspace to fill the selected areas with
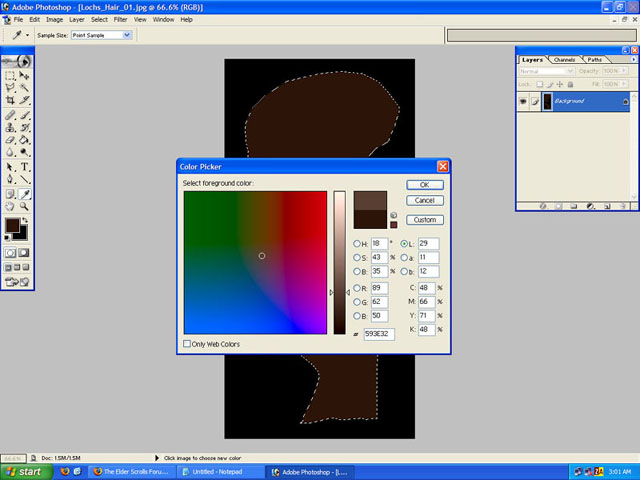
this color. You now have the base for the texture. 4. Now with your
color picker, pick a slightly lighter color than the one you
have for the base. Click the L (See Fig. 4) to pick the 'level'
which is the best for monochrome hair colors. If you like Bozo
rainbow colors, then just go nuts and pick whatever you like. You can 'lowlight' or shade in the darker direction by using the 'color burn' and the 'linear burn' modes with the paintbrush...useful before the highlights so you get a nice array of tones, and it looks less flat. You'd do this before you do the highlights but in the same way, and with a darker color than your base. Then go over it with highlights. 5. Now the work
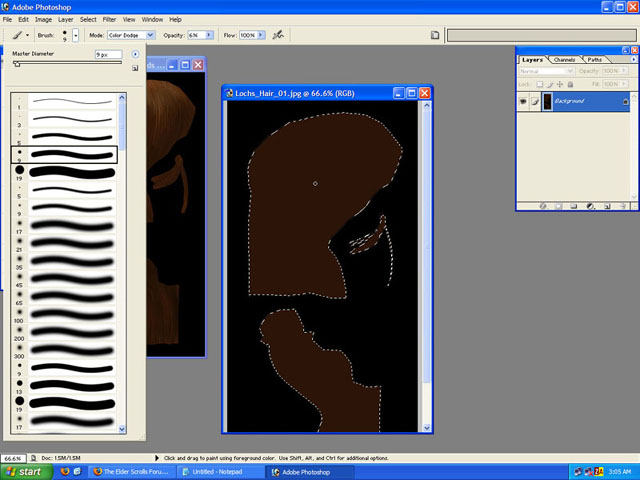
begins. Click the paintbrush tool in the tools palette, then go
to the brush picker and pick a small, hard brush (between 2-8
works for this particular texture). Then you have to set the
brush's 'mode' to either 'color dodge' or 'linear dodge' so that
it will look like it is being painted to the texture rather than
just pasted over. You can also set the 'flow' to a lower number,
but I find that breaks up the lines too much for this particular
job. Also set the opacity to a low number, around 3-6%, so you
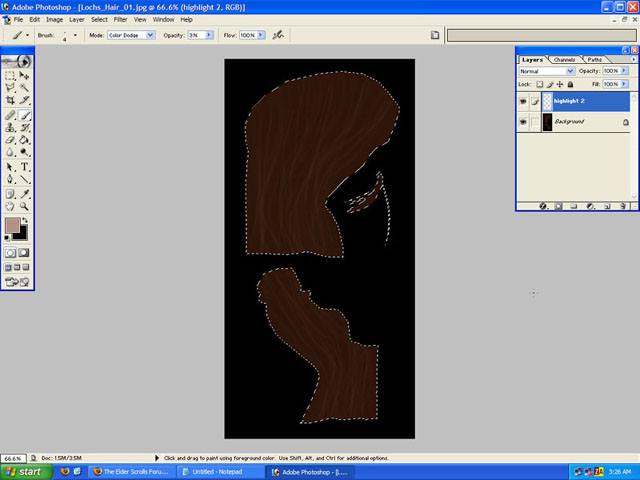
can go slowly and work the texture into shape. 6. Make a new
layer, a transparent one to actually paint on. This will help
you keep from having to do the previous steps all over again if
you mess up this part at all. Just delete the layer and start
this part again if you have to. Keeping in mind the flow of the
model's hair, now you paint in long, flowing strokes..sort of
like brushing your hair. Go from start to finish without
stopping. Dont cover the base color completely, just make even
lines along the flow (See Fig. 6) so that the base color is
still shown, but highlighted by the lighter color you've chosen.
You still have the textured part selected, so running outside
the selection wont hurt anything. Just get a basic flow going,
and go from top to bottom, across until you finish. You can
flatten the image once you're satisfied with it, to convserve HD
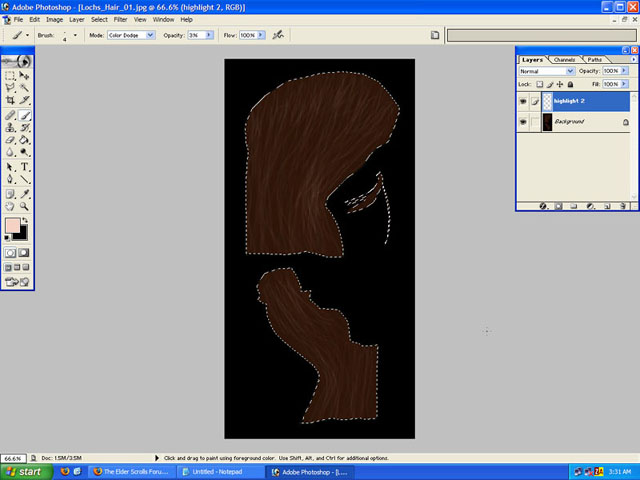
space. 7. Make another
new transparent layer, and open the color picker again. This
time you pick an even lighter color, for lighter highlights.
Repeat the process in step 6, taking care not to completely
cover up the first highlight you made...only highlight that
color, like you did to the base color before. Again, you can
flatten the image once you're satisfied with it, to convserve HD
space. 8. Repeat the same
process yet again, using an even lighter color. Each lighter
color you go, use it ever more sparigly as to not cover up the
previous colors. Pick a smaller brush size if you're having
problems keeping the previous colors intact. All the while keep
an eye on the model, and look how the flow of the hair goes with
it...try to keep it from crossing the flow as much as you
can...digital medium is pretty forgiving, but there are
boundaries. If you want more highlights or that 'shine' you
pretty ladies get in the sun, just highlight certain areas (the
rule of going the full length of the texture dsoes not apply to
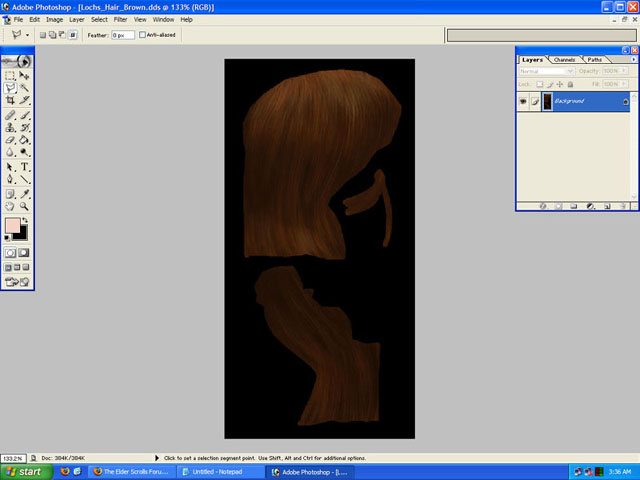
the lightest colors, you can do this and it will look good). 9. Now once you're
done with the initial colors and texture, you can select certain
parts to have broader highlights. Just use the polygonal lasso
tool to select the dome of the head area and feather it
accordingly, then bring up the levels of any layer you have to
highlight that part. 10. That's the basics. I'm no expert as you can tell by the sloppy job in the pictures, but that was just for the tutorial. I'm sure with practice you could make some slick and better textures with some practice. But this is basically how you do it. You can do this with any hair texture. Note: This tutorial is a companion piece to the Face Texturing for Morrowind tutorial.
|